I am a technologist. I try and identify patterns in anything I do and try to come up with a general abstraction that applies to the whole everytime. So it is with photography. Ever since I got a Canon Digital Rebel XTi, I began to wonder if there is a way to define the steps such that if followed we get the right snap every time.
[ad name=”blog-post-ad-wide”]
So here are the steps I have been following with full manual photography:
- Composition – Photography is an art. The most important aspect of a photo is the composition. We have seen how sometimes an image taken even with a point-and-shoot turns out to be better than the best of the DSLR’s. Composition is more important than you may think! So whenever you intend to click something, look at what you want to capture – move around to see what might be the best position from where to capture. Decide on horizontal or vertical orientation of the camera. What is the amount of noise (unwanted things in the image). Can it be reduced? Can the noise be made interesting? Think about what your image should look like before clicking – don’t leave it entirely upto the camera. Sometimes you may actually have to take a couple of snaps to see what it looks like, before you get the right shot but don’t that’s only for minor recorrections.
The composition determines the focal length – distance from your camera to the subject that you want to capture. We then look at the exposure triangle.
- Determine where the subject is and bring the subject in focus. Lock the subject and then adjust the composition. You can use the Al-Servo focus mode when you are clicking moving subjects, but otherwise it is recommended NOT to use this mode, so that you don’t introduce motion blur due to focus-ring adjustment. If you are clicking images from the same distance like in parties, you may even want to put the camera lens in manual focus mode so that it doesn’t readjust itself everytime you click a new snap.
- Aperture – One of the important things that is often got wrong by most beginners is the depth of field – the part of the image that appears sharp in the image. Digital cameras automatically adjust the depth of field when you shoot in one of the auto shooting modes, but a perfect photo is one where you clearly define the planes that you want to capture. Determine the depth of field that you need. There are no specific rules here, but I have seen that an aperture of f/11-f/14 works well for flower macros. One thing that people get confused about is the relationship between distance and aperture. A subject far away from the camera does NOT mean that the aperture is lower. It is the distance between the nearest plane and the farthest plane that determines the aperture that you need. If you have a subject close to the camera and you want the landscape as well, you will need a very low aperture setting, while if you just need the subject OR the landscape far off, you can do with a higher aperture. First determine what planes you want and your distance from the subject to determine the aperture.
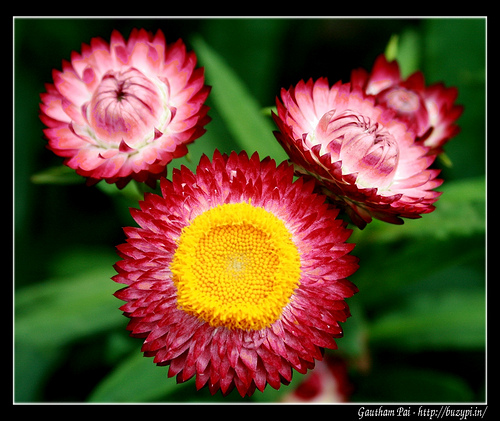
The flower in the center of the image below is in full focus, while the one on the right is partially blurred out, and the one on the left is mostly blurred out giving a sense of depth. (You can read more about my flower macro photography experiences here).
- ISO and Shutter speed – Have the ISO as minimal as possible. The optimal shutter speed is automatically determined by the camera and this is shown as an exposure reading which should be close to 0 (some snaps might require it to be at -1 or +1 or further away but that’s an exception than a norm). With the minimal ISO, see what the camera indicates as the shutter speed. If the speed is slower than 1/(current focal-length) of the camera, then you will need a tripod. If you can’t use a tripod, increase the ISO until the shutter speed is manageable without a tripod.
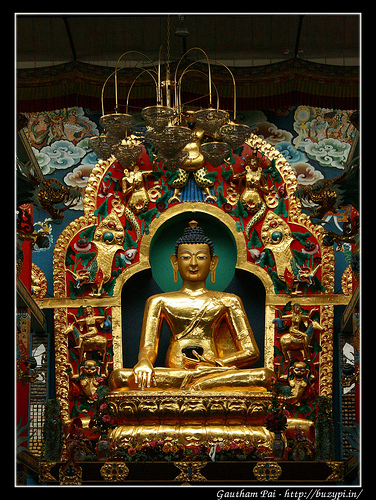
The following image had to be taken with a higher ISO because the interiors of the temple was very dark.
Here are some variations to the rule:
When you want to introduce blur into images, you may have to use both the shutter speed and the aperture to do the math and then control the ISO accordingly.When clicking fast moving far-off subjects like birds, you may have to increase the ISO to a much higher number so that you don’t introduce shakes.
Depending on your camera type, increasing the ISO beyond a point introduces a lot of noise, so you may NOT want to increase the ISO beyond a certain value, so you under-expose the image and then rescue the under-exposed image using tools like GIMP.
- Now determine other things like White balance (depending on the amount of light available). In bright sunlight, I have switched between sunlight, shade and cloudy. Increasing the temperature, gives a warmth to the image. However, when post-processing an image, you may have to reduce the saturation. I sometimes prefer to set the white-balance as auto and then post-process the image to introduce the warmth by playing with color levels and the saturation settings.
- Determine the metering mode.
- Click!
Note: The first 4 steps are extremely important. It is extremely tough to rescue an image if these go wrong. A lot of things beyond 4 can be done via post processing using tools like GIMP or Photoshop. Sometimes you may want to deliberately over-expose or under-expose your image and then post-process it using GIMP (or Photoshop) to get what you want as I have shown in these posts on rescuing under-exposed images and adding warmth. Check out the rest of my posts on photography here.


