Categories
Photography

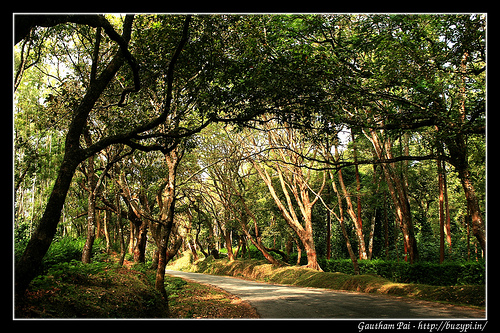
Trip to Turahalli, Chudahalli, Agara and Begur

About a couple of years back, when I had just finished the solo ring road trip, a thought came to my mind. I wanted to visit 100 unconventional places around Bangalore. I started creating a document with places around Bangalore, which soon became a list of places in Karnataka.

The recent trips are all from the list and this trip was one of them.

Categories
Photography

Trip to Horanadu, Kalasa, Kadambi Falls, Kudremukh and Hanumangundi falls

We went on a 3 day trip to Horanadu, Kalasa and Kudremukh from January 14th to 16th.

We started from Bangalore at around 5 in the morning. The route from Bangalore to Horanadu was mostly fine except for the last stretch. We took the following route to Horanadu: Bangalore (NH4) -> Nelamangala on to NH48 -> Kunigal -> Yediyur -> Channarayapatna -> Hassan -> continue on SH57 to Belur -> Chikmagalur -> Aldur -> Balehonnur -> Magundi -> Balehole -> Horanadu. The road from Magundi to Horanadu was not very good although it is very scenic. It is a stretch of about 40km.

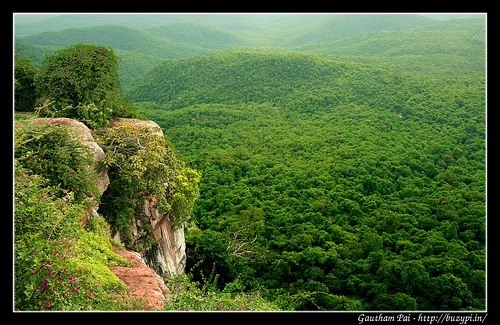
You can very easily make out when you enter Chikmagalur district. The place becomes more green, you can see quite a few hills, lakes, areca nut trees, coffee plantations, and the air is cooler and pure. We clicked a few snaps on the way.


[ad name=”blog-post-ad-wide”]

Categories
Photography

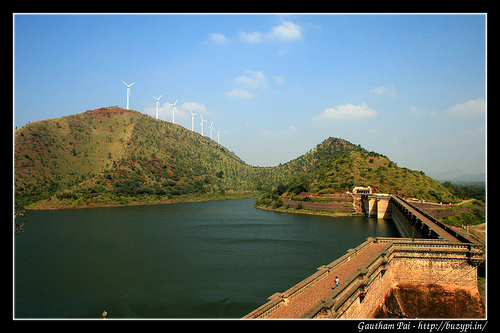
Trip to Chitradurga, Chandravalli – Ankali Caves and Holalkere

Our first trip in 2010 was to Chitradurga. Chitradurga is about 200km from Bangalore and is quite hot in the summers so this is the best time to visit if you intend to.

We had done the required preparations for the trip – mapping out all the places that we intended to visit and the distances to each of them and the things that we had to carry.

We left Bangalore at 5am in the morning. Our plan was to reach Chitradurga by noon with a visit to Vanivilas Sagar Dam on the way. The road to Chitradurga is very good; it is part of the North South corridor. The driver of our car felt like we had paid the price (toll) to rip on the roads and he was treated to a wonderful road where he was easily reaching 120-150 kmph (the maximum speed of an Indica).

We visited Vanivilas Sagar Dam around 10:15. Vanivilas Sagar Dam, aka Mari Kanive, is the oldest dam in the state. I had been to the dam just a couple of months back and so I knew that there is a way to the top.


[ad name=”blog-post-ad-wide”]

Categories
Photography

Steps to follow to get the right snap everytime

I am a technologist. I try and identify patterns in anything I do and try to come up with a general abstraction that applies to the whole everytime. So it is with photography. Ever since I got a Canon Digital Rebel XTi, I began to wonder if there is a way to define the steps such that if followed we get the right snap every time.

[ad name=”blog-post-ad-wide”]

So here are the steps I have been following with full manual photography:

  1. Composition – Photography is an art. The most important aspect of a photo is the composition. We have seen how sometimes an image taken even with a point-and-shoot turns out to be better than the best of the DSLR’s. Composition is more important than you may think! So whenever you intend to click something, look at what you want to capture – move around to see what might be the best position from where to capture. Decide on horizontal or vertical orientation of the camera. What is the amount of noise (unwanted things in the image). Can it be reduced? Can the noise be made interesting? Think about what your image should look like before clicking – don’t leave it entirely upto the camera. Sometimes you may actually have to take a couple of snaps to see what it looks like, before you get the right shot but don’t that’s only for minor recorrections.
    The composition determines the focal length – distance from your camera to the subject that you want to capture. We then look at the exposure triangle.

Categories
My Updates

Adios Ugenie

About 1.5 years back I made a decision. It was drastic. It was unexpected. Frankly, I wasn’t giving it too much thought and was trusting my intuition. A few people called me up telling me not to. I had decided to switch jobs – quit an extremely successful career in IBM and join a startup.

The recession was expected to hit and it was supposed to be a bad time to switch jobs.

It was a roller coaster ride right from the beginning but I enjoyed it thoroughly. The first all hands meet (all hands meets in startups are NOT about going to a fancy hotel and spending the day playing games), we discussed the recession that was about to hit and several alternatives were discussed to cut the costs and extend the runway. Things didn’t work out as expected and the next all hands I saw the team strength reduce to roughly half!

Right from the beginning, I liked the “openness” culture that was part of the company. Engineers got to decide to a large extent the roadmap and product features, and also interact with and learn from the users directly. A lot of what was being built was being determined based on user feedback. We had a whole bunch of success stories on the way.

4 months into my job, I came to know that we were about to be acquired. It came as a surprise to me, because things appeared so drastic. We had only started tasting success. Why this sudden decision? What about my dreams of working in a startup? Will Ugenie continue to function like one? How will things be different? Will our dreams be crushed by this parent company? Will there be a change in culture?

However, things didn’t change a lot – if anything it got better. While we did gain some financial stability, which allowed us to think about and execute longer term projects (measured in weeks instead of days), things didn’t change drastically in terms of work and the responsibilities that people had. Plus, we got to work with an excellent team over at Lulu spearheaded by Bob.

Now when I look back, I feel, making the switch was one of the most important decisions I took in my life. The last 1.5 years has been such an experience that I could not have expected from IBM.

So, after this wonderful journey, here I am, making the next leap in my career. I have accepted an offer from an early stage seed funded startup and am beginning work early next week. Why the decision? Well, it just feels right and I am mentally prepared to take up the responsibilities that this job entails.

During the course, I made some amazing new friends each of whom is unique in their own personal way. I would like to thank every one of you, who I have interacted with directly or indirectly, for the many things that I have learnt from you. It was a pleasure to know you.

A parting quote:
…, you can’t connect the dots looking forward; you can only connect them looking backwards. So you have to trust that the dots will somehow connect in your future. You have to trust in something — your gut, destiny, life, karma, whatever. This approach has never let me down, and it has made all the difference in my life. –

Steve Jobs
Categories
Technology World Wide Web

Google Reader – Mark Until Current As Read

I am an ardent feed consumer. I easily have over 300 feeds in my Google Reader and read them whenever I get a chance. The feeds include technology blogs, photography blogs, local news, startup blogs, blogs by famous people, blogs that help me in my projects etc.

It’s just not possible for me to visit every feed category every day, so I frequently see some of these categories overflow with posts.

Now I know there are extensive blog posts which describe how to better manage feeds and to cut down on information overload. But as we all know there is no simple solution.

So here I was using Google Reader and just skimming through the posts when I came across this need.

Suppose a feed has about 100 unread posts and I have skimmed through half of them, and read one in between that I thought was interesting, I am now left with quite a few posts on top of my read post, that I am not interested in reading but want to mark them as read so I don’t need to see them again. Would it be possible to mark these as read leaving the rest untouched?

The recent changes to Google Reader provide one option – Mark all entries older than a day, week or month as read. But this does not exactly serve the purpose.

I ended up hacking a Greasemonkey script to do exactly what I wanted.

Here is how the script behaves:

Just press Ctrl+Alt+Y and the script will mark all entries above the current read entry as ‘read’. Ctrl+Alt+I will mark all entries below the current entry as read – for people who read backwards. 🙂

Added benefits:

  • This also works with search results in Google Reader.
  • The script works with entire folders, so you can skim through all posts in a folder marking the ones you have skimmed as read.

How it works:
The script uses the css class names to determine which posts are unread above (or below) the current post. Once it obtains this list, it simulates a click on each of these posts and thereby marks them as read. Simple as that!

This script is part of the Better GReader extension and has featured in Lifehacker.

In order to install the Google Reader – Mark Until Current As Read script, visit this site.

Categories
Photography

Lalbagh Flower Show – August 2009

One of the reasons why I visited Lalbagh in June was to make sure I know what it takes to click flower macros using a SLR. While I did get a few good snaps, I was in for a very different treat when I visited the flower show last Saturday.

The last time I visited the Lalbagh flower show was in January 2007, which meant I hadn’t been there for 2.5 years!

Categories
Technology

Getting Reliance (Huawei) USB Data Card to work in Ubuntu 9.04 (Jaunty)

In order to get Reliance USB Data Card to work in Ubuntu, follow these steps:

  1. Make sure wvdial is installed
    sudo apt-get install wvdial
  2. Add the device configuration to your /etc/wvdial.conf

    Replace <phone-number> with your 10 digit Reliance connection number.


    [Dialer Defaults]
    Phone =
    Username =
    Password =
    New PPPD = yes


    [Modem0]
    Modem = /dev/ttyUSB0
    Baud = 115200
    SetVolume = 0
    Dial Command = ATDT
    Init1 = ATZ
    FlowControl = Hardware (CRTSCTS)


    [Dialer cdma]
    Username = <phone-number>
    Password = <phone-number>
    Phone = #777
    Stupid Mode = 1
    Inherits = Modem0

  3. Run wvdial
    sudo wvdial cdma

    You will see some output like this:

    ~$ sudo wvdial cdma
    --> WvDial: Internet dialer version 1.60
    --> Cannot get information for serial port.
    --> Initializing modem.
    --> Sending: ATZ
    ATZ
    OK
    --> Modem initialized.
    --> Sending: ATDT#777
    --> Waiting for carrier.
    ATDT#777
    CONNECT 230400
    --> Carrier detected. Starting PPP immediately.
    --> Starting pppd at Sat Jul 11 22:56:19 2009
    --> Pid of pppd: 4299
    --> Using interface ppp0
    --> pppd: ????[18][18]m X[19]m
    --> pppd: ????[18][18]m X[19]m
    --> pppd: ????[18][18]m X[19]m
    --> pppd: ????[18][18]m X[19]m
    --> local IP address <IP>
    --> pppd: ????[18][18]m X[19]m
    --> remote IP address <IP>
    --> pppd: ????[18][18]m X[19]m
    --> primary DNS address <IP>
    --> pppd: ????[18][18]m X[19]m
    --> secondary DNS address <IP>
    --> pppd: ????[18][18]m X[19]m
    --> pppd: ????[18][18]m X[19]m
    --> pppd: ????[18][18]m X[19]m

That’s it! You must now be able to browse the Internet. In order to disconnect press Ctrl+C.

Categories
Photography

Selective editing using image decomposition and the threshold tool using GIMP

Have you seen photos where parts of the image are enhanced more than the others? Have you come across situations where color level editing over the entire image darkens some portions of the image so much that they become invisible or when you apply warmth to an image, some parts look artificial? If so, what you need is selective editing and this post covers how to use GIMP to do selective editing.


[ad name=”blog-post-ad-wide”]

This post covers quite a few aspects of GIMP image editing:

  • Image decomposition
  • Quick mask
  • Alpha channel
  • Selective editing

Using this, we convert an image that looks like this:

to:

[ad name=”blog-post-ad-wide”]

Categories
Photography

Trip to Gopalaswamy betta and BR hills

We went to Himavad Gopalaswamy betta and B. R. hills last weekend. The main intention of the trip was photography.

We left Bangalore on Friday night and reached Mysore early morning. There were some adhoc changes to our plan; we were supposed to go to Mysore by train, but later realized that a car is going to cost the same and so hired a car in the last minute.

[ad name=”blog-post-ad-wide”]